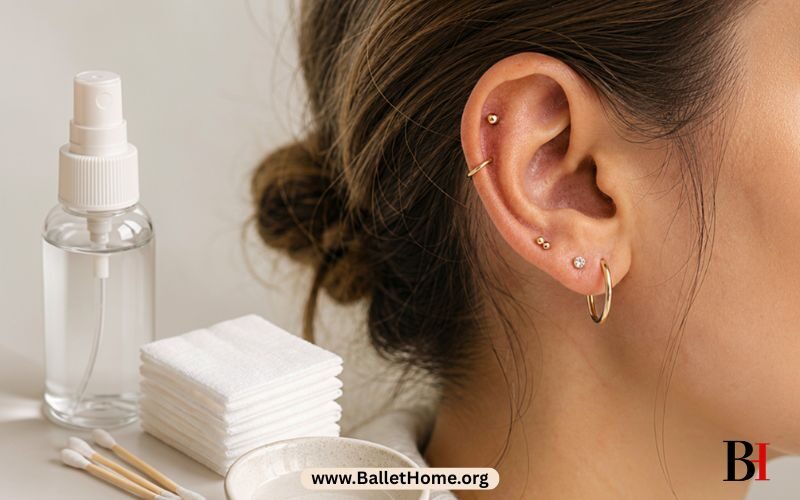
Most women dream of getting ear piercings and you were one of them. Now you have taken the first step, you walked into the studio and came out with a brand new piercing. The excitement is real but nobody warns you about what comes next. The piercing itself takes ten seconds but the ear piercing aftercare takes months. Everything that happens in those months is completely in your hands.
Ear Piercing Aftercare Checklist
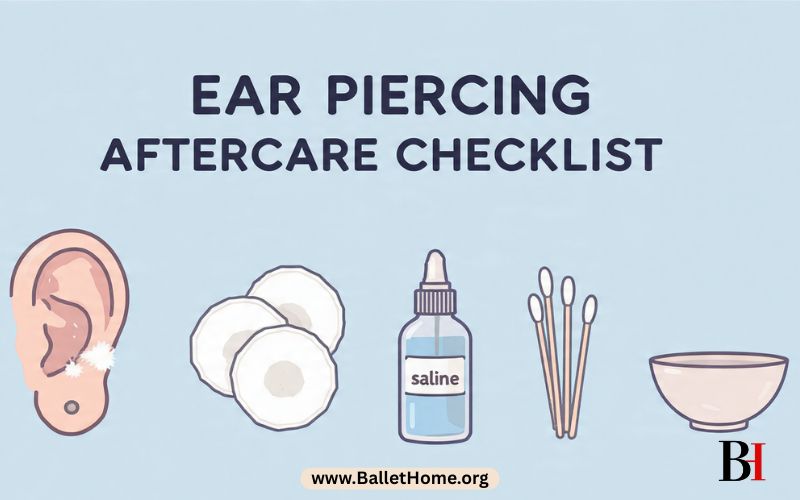
Follow this simple ear piercing aftercare checklist every day to help your piercing heal properly and reduce the risk of infection:
- Clean your piercing twice daily with a sterile saline solution to support proper healing.
- Avoid touching or rotating jewelry during the healing process.
- Monitor for infection signs, including spreading redness and increased pain
- Watch for swelling and seek advice if it worsens after the first week.
- Choose implant-grade titanium jewelry to minimize irritation and allergic reactions.
- Sleep carefully with new piercings to avoid pressure and support faster healing.
- Follow the ear piercing healing time and avoid changing your jewelry too early.
What Happens During Ear Piercing Healing Stages
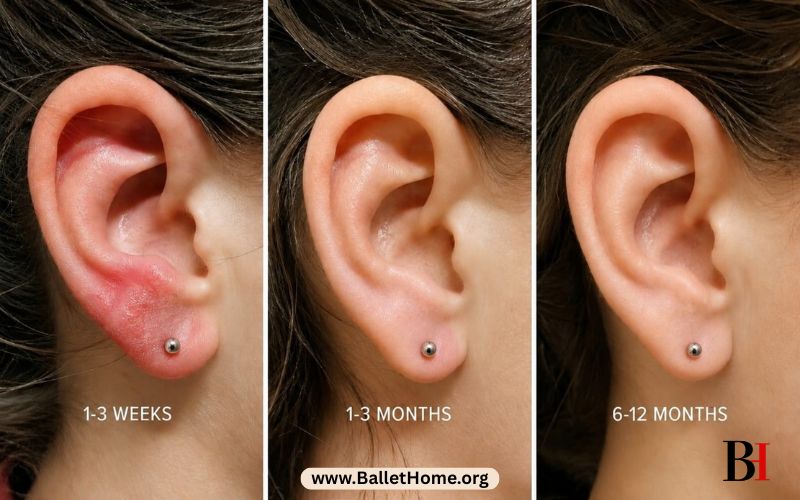
The moment that needle goes through your skin, your body immediately starts working to fix it. It does not know you went to a studio, it just knows something sharp went through your tissue. The ear piercing healing stages move through three phases, starting with inflammation in the first three weeks. Your ear will be red, warm and a little swollen during this time. Then comes the rebuilding phase, where new tissue forms around the jewelry over the next three months. The final stage is full maturation, which can take up to a full year for cartilage piercings. Most people make their biggest mistakes during the second stage of healing. The ear looks fine on the outside, so they stop being careful but the inside is still healing and that is where most problems begin.
How to Clean an Ear Piercing the Right Way
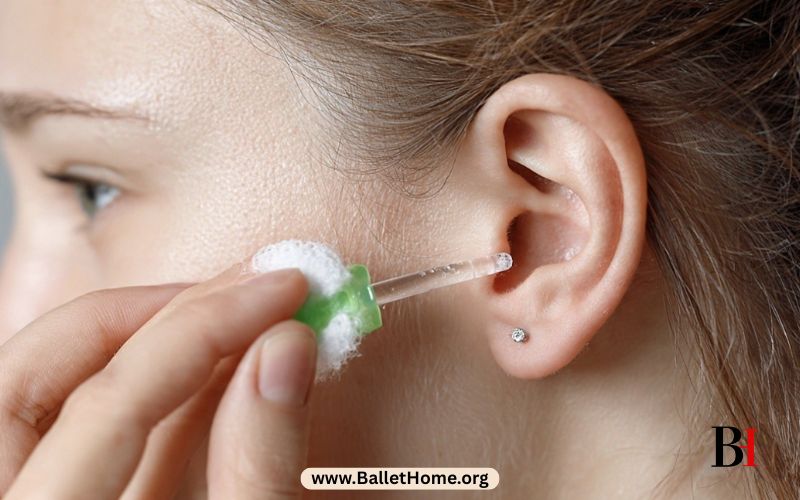
Here is where a lot of people go wrong with ear piercing aftercare, they don’t know how to clean an ear piercing right way right from the very start. They think cleaning more often means healing faster, so they clean five times a day. Rubbing alcohol, hydrogen peroxide and soap with fragrance feel responsible but all of it slows healing. The right way to clean is to use a sterile saline solution for ear piercings twice a day. Spray it on and let it sit for a moment before wiping gently with clean gauze. Do not use cotton balls because the fibers stick to the wound. Do not rotate the jewelry because that tears the healing skin inside the channel. If you have been wondering, can I use alcohol to clean my ear piercing? The answer is no. Alcohol kills bacteria but also kills the healthy cells your piercing needs.
Related Reading: How to Clean Ear At Home Safely
Ear Piercing Infection Signs You Should Not Ignore
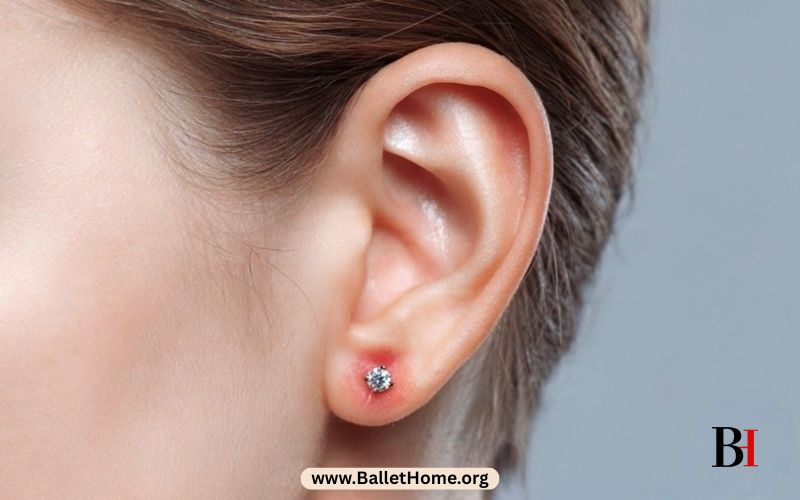
At some point during healing, you will look at your ear and wonder if something is wrong. The ear piercing infection signs that should concern you are redness spreading outward from the site. Pain that gets worse over time is another serious sign to watch for. Discharge that is thick, yellow or green and warmth that does not go away are also red flags. Some ear piercing pus in the first few weeks is actually normal and part of healing. Clear or white fluid is just lymph fluid doing its job. But pus in an ear piercing that is colored and smells bad needs immediate attention. Ear piercing swelling in the first few days is completely expected and normal. But if the swelling in the ear after piercing keeps getting worse after a week, something is off. Do not remove the jewelry if you suspect an ear piercing infection, because that can trap the infection inside. See a doctor instead.
How to Treat an Infected Ear Piercing at Home
Catching an infected ear piercing early gives you real options before things get serious. If the signs are mild, increase your saline cleanses to three times a day right away. Apply a warm compress for five minutes before each cleaning to help draw out any buildup. Keep your hands away from the piercing unless you are actively cleaning it. Stay out of pools, lakes and any water that could introduce new bacteria. Most mild infections respond well to this routine within 48 hours of starting. If yours does not improve or you develop a fever, go see a doctor immediately. A serious ear piercing infection left alone can become an abscess that requires medical treatment. In cartilage piercings, it can develop into perichondritis which can permanently damage the shape of your ear.
Related Reading: How to Get Water Out of Your Ears Quickly
Best Metal for Sensitive Ears

The jewelry inside your piercing is not just decoration during the healing period. It is a medical device sitting inside an open wound every single day. Picking the right material is one of the most overlooked parts of ear piercing aftercare. The best metal for sensitive ears is implant-grade titanium because it is light and contains no nickel. The titanium vs surgical steel earrings debate comes up constantly in the piercing community. Surgical steel is fine for most people but it contains trace nickel that cause reactions in sensitive skin. Titanium is the clear winner for anyone with known sensitivities or a nickel allergy. The best earring metal for sensitive ears also includes implant-grade gold at 14k or higher and niobium. Avoid plated jewelry, mystery metals and anything labeled hypoallergenic without specifying the actual material used.
How to Sleep With New Ear Piercings
Nobody thinks about sleep until they wake up at 3 am with their ear throbbing from pressure. Sleeping with new ear piercing jewelry pressing into a pillow every night causes irritation, bumps and delays healing significantly. Use a travel pillow and rest your ear in the hole to avoid all direct contact. If you have piercings on both sides, alternate sleeping positions or find a pillow setup that works. How to sleep with new ear piercings also comes down to keeping your pillowcase clean and fresh. Bacteria from hair products, sweat and dead skin cells press against your healing wound every single night. Change your pillowcase every two to three days or place a clean T-shirt over the pillow and flip it nightly.
Ear Piercing Healing Time and When to Change Your Jewelry
Everyone wants to know when they can finally swap out their starter jewelry for something new. Ear piercing healing time for lobes is typically 6 to 8 weeks for the initial stage. But full internal healing actually takes anywhere from 3 to 6 months to complete. Cartilage piercings need a minimum of 6 to 12 months before they are truly ready. When can I change my ear piercing is a question best answered by your piercer not an online timeline. How long until I can change my earring also depends on how consistently you follow your aftercare routine. Changing too early is one of the top causes of healing setbacks and irritation. When you do change it, move slowly, use clean hands and return to implant-grade materials immediately.
Ear Piercing Aftercare Products Worth Using
Good ear piercing aftercare also means knowing which products are actually worth your money. The market is full of unnecessary things but what you actually need is very simple. A sterile saline solution for ear piercings with 0.9% sodium chloride and no additives is all you need. No tea tree oil, no lavender, and absolutely no alcohol should be anywhere near a fresh piercing. A cleaning solution for ear piercings loaded with extra ingredients is usually more marketing than actual medicine. An ear piercing cleaner made specifically for wound care will always outperform any DIY saltwater solution you mix at home. The truth about ear piercing aftercare is that it is not complicated at all. It just requires you to stay consistent long after the excitement of a new piercing wears off. Your body is doing all the hard work every single day. Your job is simply to give it the right conditions to finish healing properly.